Organize and customize your Account Information overview
- Sort, add or remove columns
- Change the account holder / alias name
- Create and manage filters in account information
Sort, add or remove columns
You can add or remove columns by going to the header of the column with your mouse and clicking on the arrow down button to display the ability to sort the column and remove/add columns.
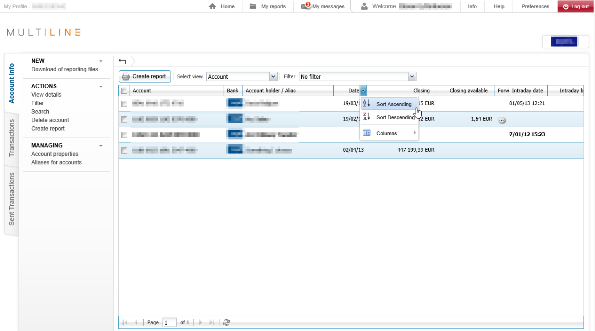
Note: sorting will be disabled if the view is set to Bank. To modify the sorting, first change the view to Account.

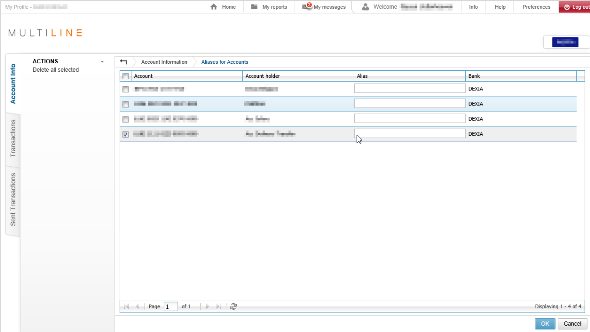
How to configure aliases for reporting and ordering accounts
In the overview of the available accounts or in the list of your ordering accounts, the Account holder name is defined by the bank. If the name is unclear or confusing, you can assign an easy-to-remember alias for each account number.
Why configuring aliases?
When an ordering account alias is configured, you will be able to search on the configured alias when creating a payment.
![]()
When a reporting account alias is configured, in the account information overview, the alias will be shown instead of the account holder (which is configured by the bank)

How to access
Important: Aliases must be configured for both ordering and reporting accounts. They are configured separately, meaning an alias configured in the tab Account info is not always available when creating a new payment and vice versa.
- For reporting accounts: Select Account Info tab> Aliases For accounts, from the left navigation menu
- For ordering accounts: Select Transactions tab > Aliases For accounts, from the left navigation menu
How to create and manage filters in Account Info
Purpose of using filters
Managing filters
Purpose of using filters
Using filters can be of great help to organize your account information area the way you want to. A single account can be part of multiple filters. You can create your own custom filters.
Examples:
- Only your most consulted one
- By type (savings or current account)
- All accounts from a specific bank
- Only your foreign accounts
- Only with a specific currency
- By a specific subsidiary
- …
How to access
To manage (create, modify or delete) filters, go to the tab Account information and click on Filters in the left navigation menu. If you already have existing filters, you can easily switch between them from account information.
Depending on the amount of available accounts a different view may appear
When you only have a limited amount of accounts
When you have a large amount of accounts

Managing filters
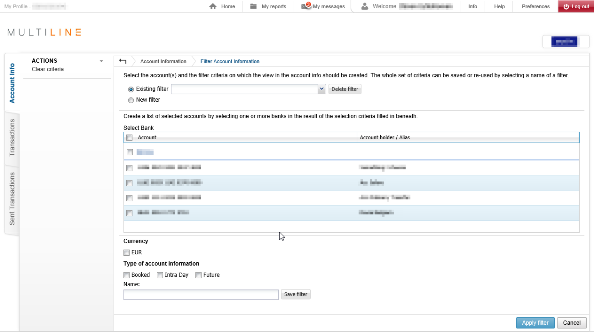
Creating a new or modifying a filter
- Go to the Filter window
- If you want to modify an existing filter, select the existing filter from the dropdown list. The configuration of the existing filter will be loaded.
- Select the accounts you want to include in your filter
Note: When you only have a limited amount of accounts, you can simply select the accounts you want to include. In case you have a large amount of accounts, you will need to search for the accounts using the Search feature. - Optionally, select a specific currency or type of account information
- Booked: accounts which have booked statements (usually this is almost all your accounts)
- Once your filter is set up, you can:
- Save your filter by typing a name and clicking Save filter. If you want to modify an existing filter, simply type the same name and press Save filter (a confirmation to overwrite the existing filter will appear)
- Apply filter will go back to Account info with your filters configuration. Click again on Filter to modify or save your filter.
Note: your filter will be lost if you do not save it
Deleting an existing filter
- In the filter window
- Choosing Existing Filter and select the filter from the dropdown list
- Once selected, click Delete filter to remove the selected filter
Note: no confirmation will be displayed
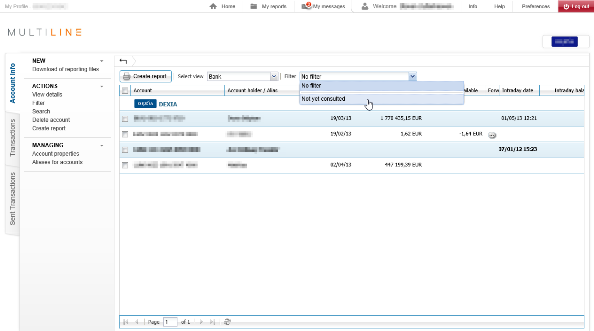
Switching to another filter
- Go to the tab Account info
- Click on the filter dropdown list to display the available filters
- Choose the desired filter
Note: “Not yet consulted filter” will be by default available