Transaction actions and envelopes
- Transaction actions
- Using envelopes
Transaction actions
Modify transaction
- Open the details of your transaction
- Choose Modify transactions(s) from the left navigation menu
Sign or send transaction
- Select the transactions you want to sign or send
-
Click on Sign or send located in the left navigation menu
- Sign: The signing window will appear
- Send: Will send the transaction. In case the transactions are not yet signed, you will be prompted to sign them.
Note: From the preferences > Transactions, you can choose to “Send when sufficiently signed”.
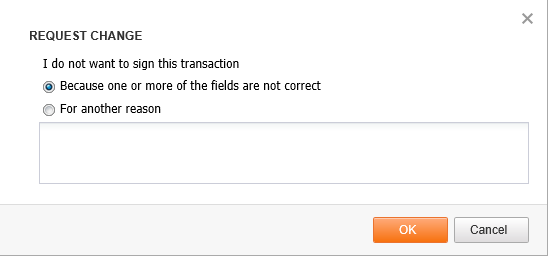
Reject a transaction or request a change
As signer, you will have the option to reject a transaction or request a change.
- Open the details of the transaction
- Click on Request change from the left navigation menu
-
Specify the reason why you reject the file
When a transaction is rejected, the file will get the status rejected ![]() . The specified reason why it is rejected can be found in the details of the transaction.
. The specified reason why it is rejected can be found in the details of the transaction.
Note: once it is rejected, it cannot be modified anymore. The creator must recreate or upload the corrected transaction again.
Create a report (print) transaction
- Select the transactions you want to include in your report
- Click on Create report from the left navigation menu
- The Create report window will be displayed
- Choose between which type of report you want
- Overview: creates a report with the same data as shown in the Transactions overview
-
Details: details of your selected transactions with following options:
- Add processing options: adds the audit trail into your report
- Start new page per file
- Sorting feature
- Summary: Creates a summary report of the selected payments (together with the content of group of payments or SEPA direct debit)
- Once your report is generated, you will be able to download it in My Reports
Invite another user to sign a transaction
When inviting a potential signer, the invited user will receive a mail (only if the signer has configured an email address in the preferences > General) informing him a transaction is ready to be signed.
- Open the details of your transaction
- In the left navigation menu, choose Modify processing options
- From the processing options, select the potential signers and use the arrow button to invite these users

Reuse, duplicate or clone a transaction
- Open the details of your Transaction
- In the left navigation menu, select Clone transaction
- A message will be shown informing you that the execution date will be updated.
- Confirm this message to reuse the transaction with all its content
Using envelopes
Envelopes can be used to easily cleanup your transaction area by assigning similar transactions to the same envelope. You can assign them based the status (signed, not signed), the signer (User X must sign),…
The color of the envelope is based on the status of the transactions in the envelope:
- Green envelope: all banking files are sufficiently signed
- Blue envelope: all banking files are ready to be signed
- Orange envelope: all banking files are already signed but still insufficiently signed
- Yellow envelope: all banking files are in the TO BE COMPLETED status (ex. to accept an upload condition)
- Red envelope: all banking files are in the ERROR status
- White Crosshatched envelope: the banking files have a different status
Add transactions to an envelope
- Select the transaction(s) you want to assign to the same envelope
- In the top right corner, click on Assign to envelope
- The window Assign selected transactions to will appear:
- Choose an existing envelope from the list
- Define the new name of your envelope and click on Create envelope. If no name is defined, the name of the envelope will be “Envelope of user name (date and time)”
Note: Although there is no limit, it is recommended to only have a maximum of 100 transactions in a single envelope.
Remove transactions from an envelope
- Select the transaction that you want to remove from the envelope
- Click on Remove from envelope. In case you want to assign it to another envelope, you do not need to remove it first from the current envelope
Rename an envelope
- Simply click on the current name of the envelope
- A text field will be shown where you can change the name
- Press ENTER if the name is adapted