Creating Reports
- Creating specific report types
- Download one or multiple reports
- Schedule account information reports
- Importing TXT report into a spreadsheet application
Creating specific report types
Balance overview report
A balance overview report will include an overview of accounts together with the account balance, statement number (if a statement occurred on that day),…
To create a balance overview report:
- Go to the tab Account Info
- Select the account(s) you want to include in your report. If no accounts are selected, all accounts that are currently visible in your filter will be included in the report
- Click on Create report from the left menu. As a result the Create report window will be displayed
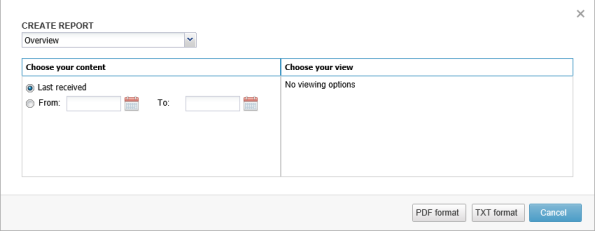
- Make sure Overview is selected from the dropdown list
- Last received: will create a report with an overview of the last receive balance information
- From – To: will create a report with an overview of the balances that were available on and between the days specified
TIP: To have an overview of the account balances on a specific day in the past (example balance information on 1 January 2014), set the From and To date on the same date (example 01/01/2014)
- Click on PDF format or TXT format to request your report
- A message (in the right corner) will briefly appear to notify that the report is requested. Once the report is finished, you can download it from My Reports
All statements between two dates
A statement report will include the details of all statements (and the transactions) of the statements you specify.
To create your statement report:
- Go to the tab Account info
- Select the account(s) you want to include in your report. If no accounts are selected, all accounts that are currently visible in your filter will be included in the report
- Click on Create report from the left menu. As a result the Create report window will be displayed
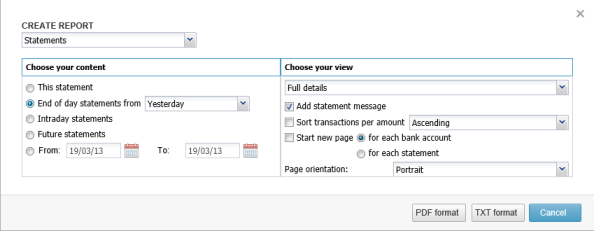
- Make sure Statements is selected from the dropdown list
- Choose to between:
- End of day statement from Yesterday, This week, This Month or Today.
- From – To: will include all statements between these dates
- Optionally, you can modify your report layout and content in the “Choose your view” part of the window
- Click on PDF format or TXT format to request your report
- A message (in the right corner) will briefly appear to notify that the report is requested. Once the report is finished, you can download it from My Reports
Report of a specific statement
A report of a specific statement will show the details of all transactions that occurred on a specific statement.
To create a report of a specific statement:
- Go to the statement that you want to include in the report
- Click on Create report from the left menu. As a result the Create report window will be displayed
- You will notice that “This statement” will be selected by default.
- Optionally, you can modify your report layout and content in the “Choose your view” part of the window
- Click on PDF format or TXT format to request your report
- A message (in the right corner) will briefly appear to notify that the report is requested. Once the report is finished, you can download it from My Reports
Report of a specific transaction
A report of a specific transaction will show the details of all transactions that occurred on a specific statement.
To create a report of a specific statement:
- Go to the statement in which the transaction is located
- Once located, select the transaction(s) you want to include in the report using the checkboxes in the first column
- Click on Create report and make sure to select Selected Transactions instead of Statements (as shown below)
- Click on PDF format or TXT format to request your report
- A message (in the right corner) will briefly appear to notify that the report is requested. Once the report is finished, you can download it from My Reports
How to download or schedule reports
- Download one or multiple reports
- Scheduling daily account information reports
- Importing TXT report into a spreadsheet application (Microsoft Excel, LibeOffice Calc)
You can access My reports window from anywhere in the application by clicking on ![]() in the top right corner.
in the top right corner.
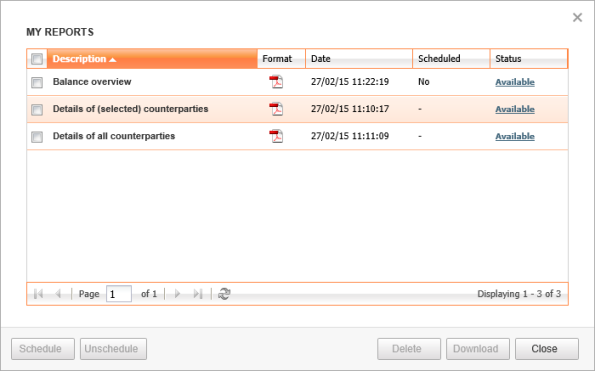
Download one or multiple reports
- To download a single report:
- In the column status, click on the status (the report must be complete, so not have the status “In progress”)
- Download the TXT or PDF. Depending on your setup the option Open might be available
- To download multiple reports:
- Select the reports you want to download (all the selected reports must be complete, so not have the status “In progress”)
- Click on download
- Download the ZIP archive. This ZIP contains all your requested reports
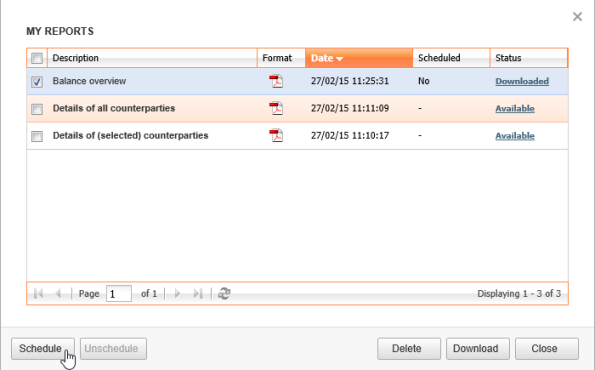
Scheduling daily account information reports
When scheduling a report, the report will become automatically available for you at 8 a.m. on every workday. A scheduled report is only possible when you are using relative dates (e.g. yesterday, this week …) while creating a report in account information.
- Go to the tab Account Info
- Select the accounts that you want to be included in the report and choose Create report.
- In the Create report window, set the option to Statement and select End of day statements from option and the desired relative date. Choose your desired view options. Choose Show PDF or Export TXT to create the report.
- Open the report once it´s finished and verify if this is the report you want to schedule.
- In the My reports window, select the report you want to schedule > click Schedule
Note: If the column Scheduled does not contain “No”, your report is not possible to schedule (= it is not based on a relative date as expected in step 3)
Importing TXT report into a spreadsheet application (Microsoft Excel, LibreOffice Calc)
Reports created in TXT can be imported into a spreadsheet application (like Microsoft Excel or LibreOffice Calc). You will first need to create your report as TXT and save it locally.
- Open your spreadsheet application
- Choose File > Open > in the Open window, make sure the filetype is set to All files (*.*) > select your file that was downloaded from Multiline
- The import wizard will be shown
Note: the delimiter or separator in Multiline is configured in the preferences- Microsoft Excel: Choose Delimited > select your delimiter (usually this is a semicolon) > continue the import wizard
- LibeOffice Calc: Choose Separated by > select your delimiter (usually this is a semicolon) > continue the import wizard
- Once the wizard is finished, your data will be available in your spreadsheet application