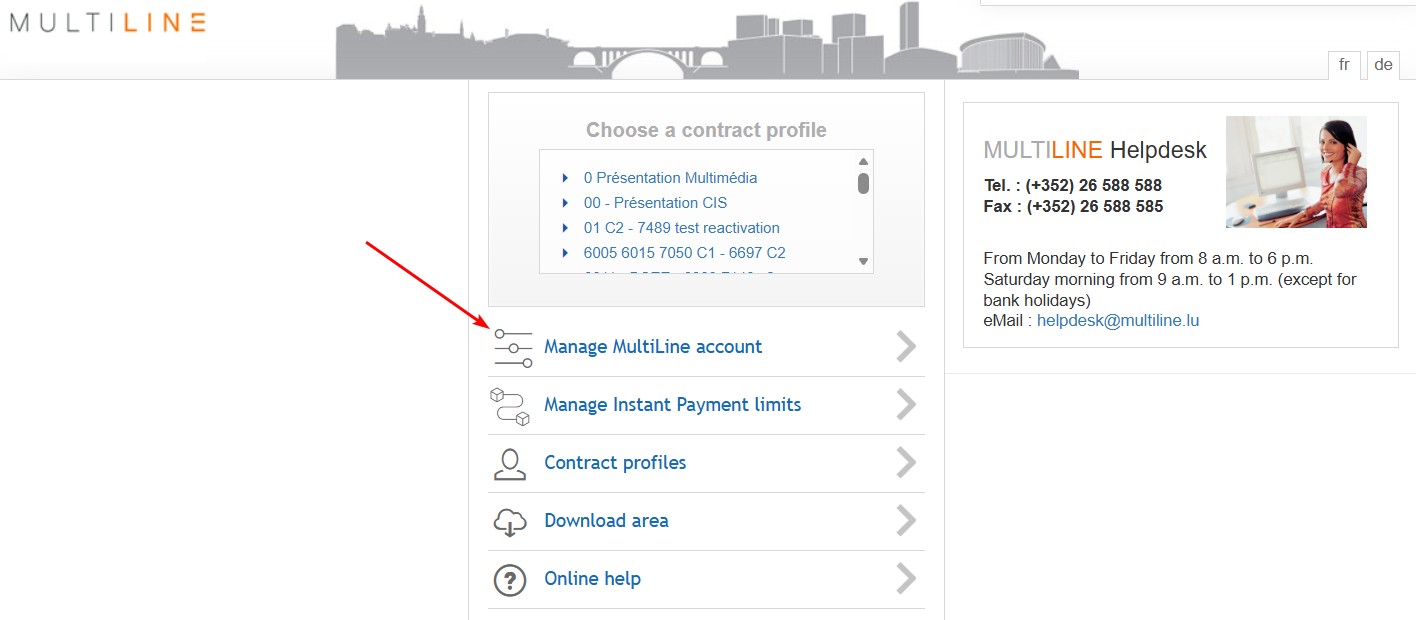
Manage MultiLine account
The management of your MultiLine account lets you view a current overview of all your bank accounts and the actions you can perform, based on the bank accounts and permissions configured by your bank.
On the home page, select “Manage MultiLine Account”:
Screen overview
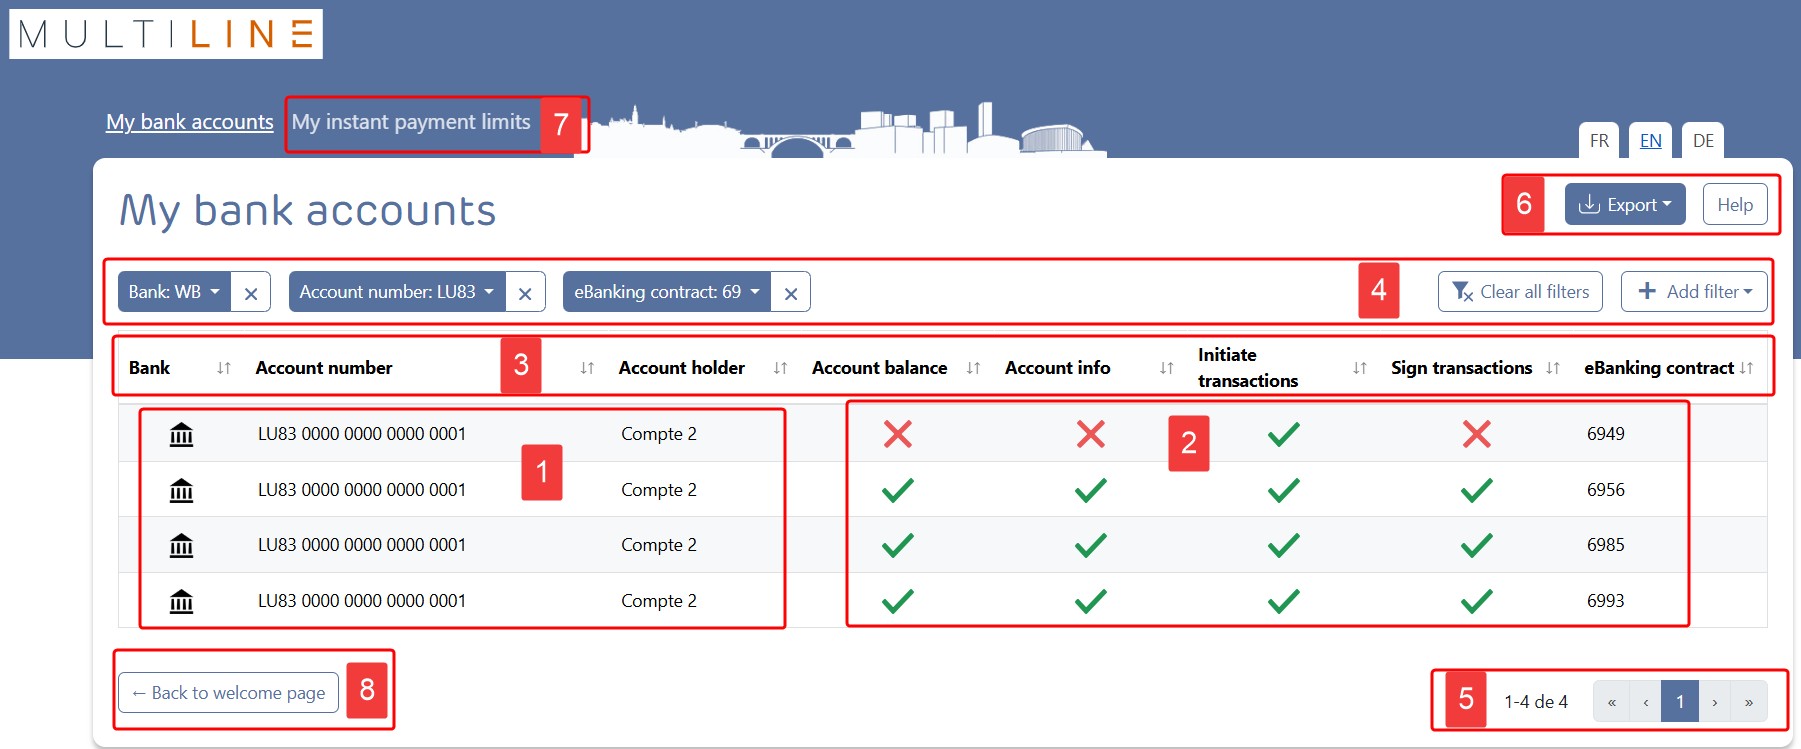
- Account ownership
The account number, account type and account holder are assigned by your bank. When you click on the row, the account details are displayed.
An alias is shown if you have assigned a custom alias name to this account in MultiLine in the Account Info or Transactions tabs:
– Click Aliases for accounts in the left-hand menu Managing section.
– Enter an alias for the corresponding account and click OK at the bottom. - Available actions
When a green checkmark is shown for a particular action, you can perform that action with the indicated account.
View balances
You have the right to see the account balance. In MultiLine, the bank account is visible in the Account Info overview. For new bank accounts, the account will be visible in the Account Info overview after the next movement, as soon as the bank sends you an updated balance.
View statements
You have the right to view account statements. In MultiLine, you can browse statements when you click on the account in the Account Info overview. For new bank accounts, the account will be visible in the Account Info overview after the next movement, as soon as the bank sends you a new account statement.
Initiate transactions
You have the right to initiate transactions with this account as the ordering account. When you export the account list to Excel or PDF, an additional distinction is made between Entering and Uploading files.
Sign transactions
You have the right to sign transactions with this account as the ordering account. Additional signatures may be required for a transaction to be sufficiently signed.
If you wish to modify your mandates for a bank account, please contact the bank offering this account in MultiLine. - Sorting
Click a column header to sort the list by that field. Click the same column header again to reverse the sort order.
- Filters
Use the Add filter function when you want to limit the list to a bank, an account, an alias, a function or a combination of different values.
– Click Add filter and select the fields you want to apply a filter to. The selected fields appear on the left.
– Click the fields on the left to set a filter value.Click Clear all filters to return to the full list.
- Navigation bar
Use the buttons at the bottom to scroll through multiple pages of accounts or to return to the home page.
- Export the account overview
– Click Export
– Choose between Excel or PDF formatThe full account list is exported to a downloadable file, considering the chosen filter and sort. Information included in the export file:
– Account information: Bank, Account number, Account holder, Alias, Account type, eBanking contract
– Rights: Account balance, Account info, Initiate transactions, Sign transactions, Encode transactions*, Upload transaction files*
– Information about the list: Applied filters, Applied sort
* only in the Excel report - Manage instant payment limits
For banks that have subscribed to the service, it is possible to view and modify the limits for instant payments. Only accounts that allow instant payments and for which you have signing rights will be visible.
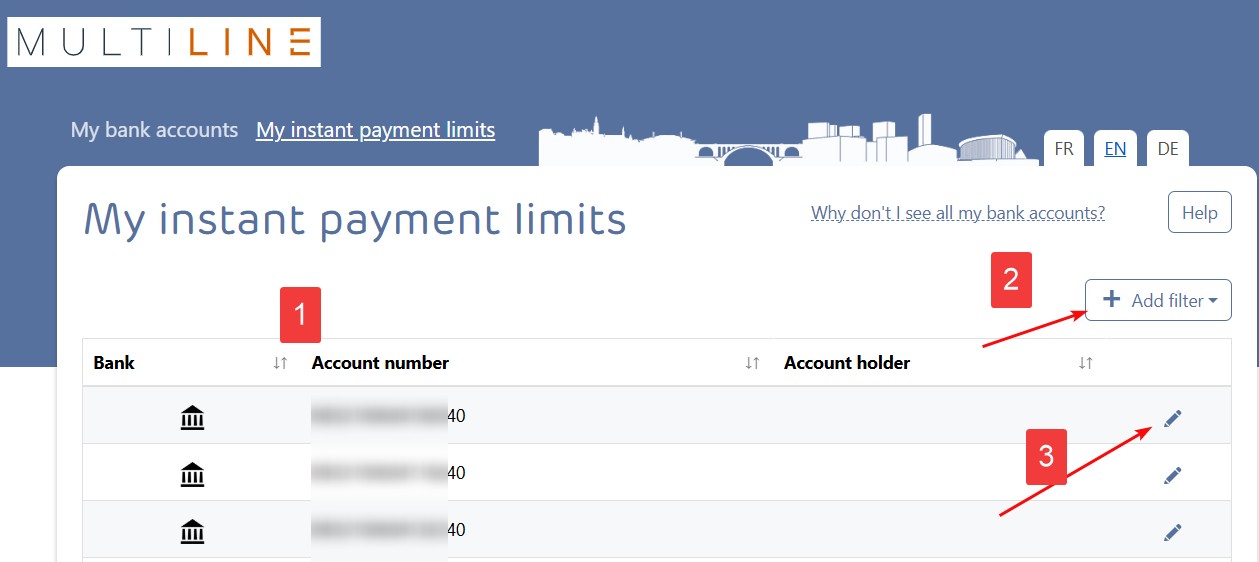
1 – List of accounts for which the instant payment limit can be modified.
2 – Filter to search for accounts.
3 – View and modify the instant payment limit. The current limit is displayed; when modifying, a signature screen will appear to validate the new limit.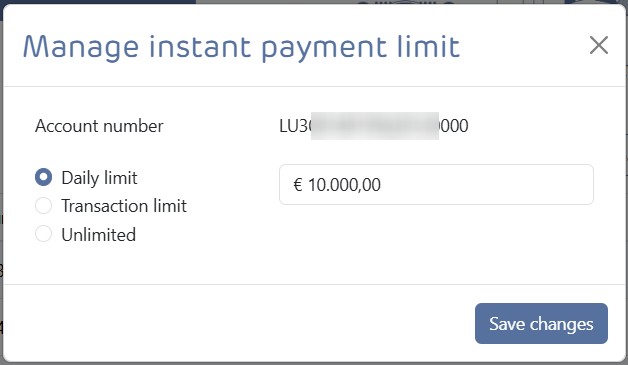
- Back to the home page
Exit account management and return to the home page.
- An account is not displayed
Clear all filters and re-check.
If you still do not see the account:– For this account, no mandate has been assigned to you. If you want to request a modification, please contact the bank offering this account in MultiLine.
– If the account has just been added by your bank, you may need to wait about an hour before it appears in the list.